
Introduction
This document gives a highlevel overview of components in the Venezia Touch door pictured below.
The Venezia is configured in similar ways to the TopBrewer series, with the main exception being a water tank, and a build-in userinterface instead of tablet/smartphone.
NB: Venezia Touch requires firmware v4.0.0 or later, and Barista PC v3.0.0 or later.
Venezia door views:
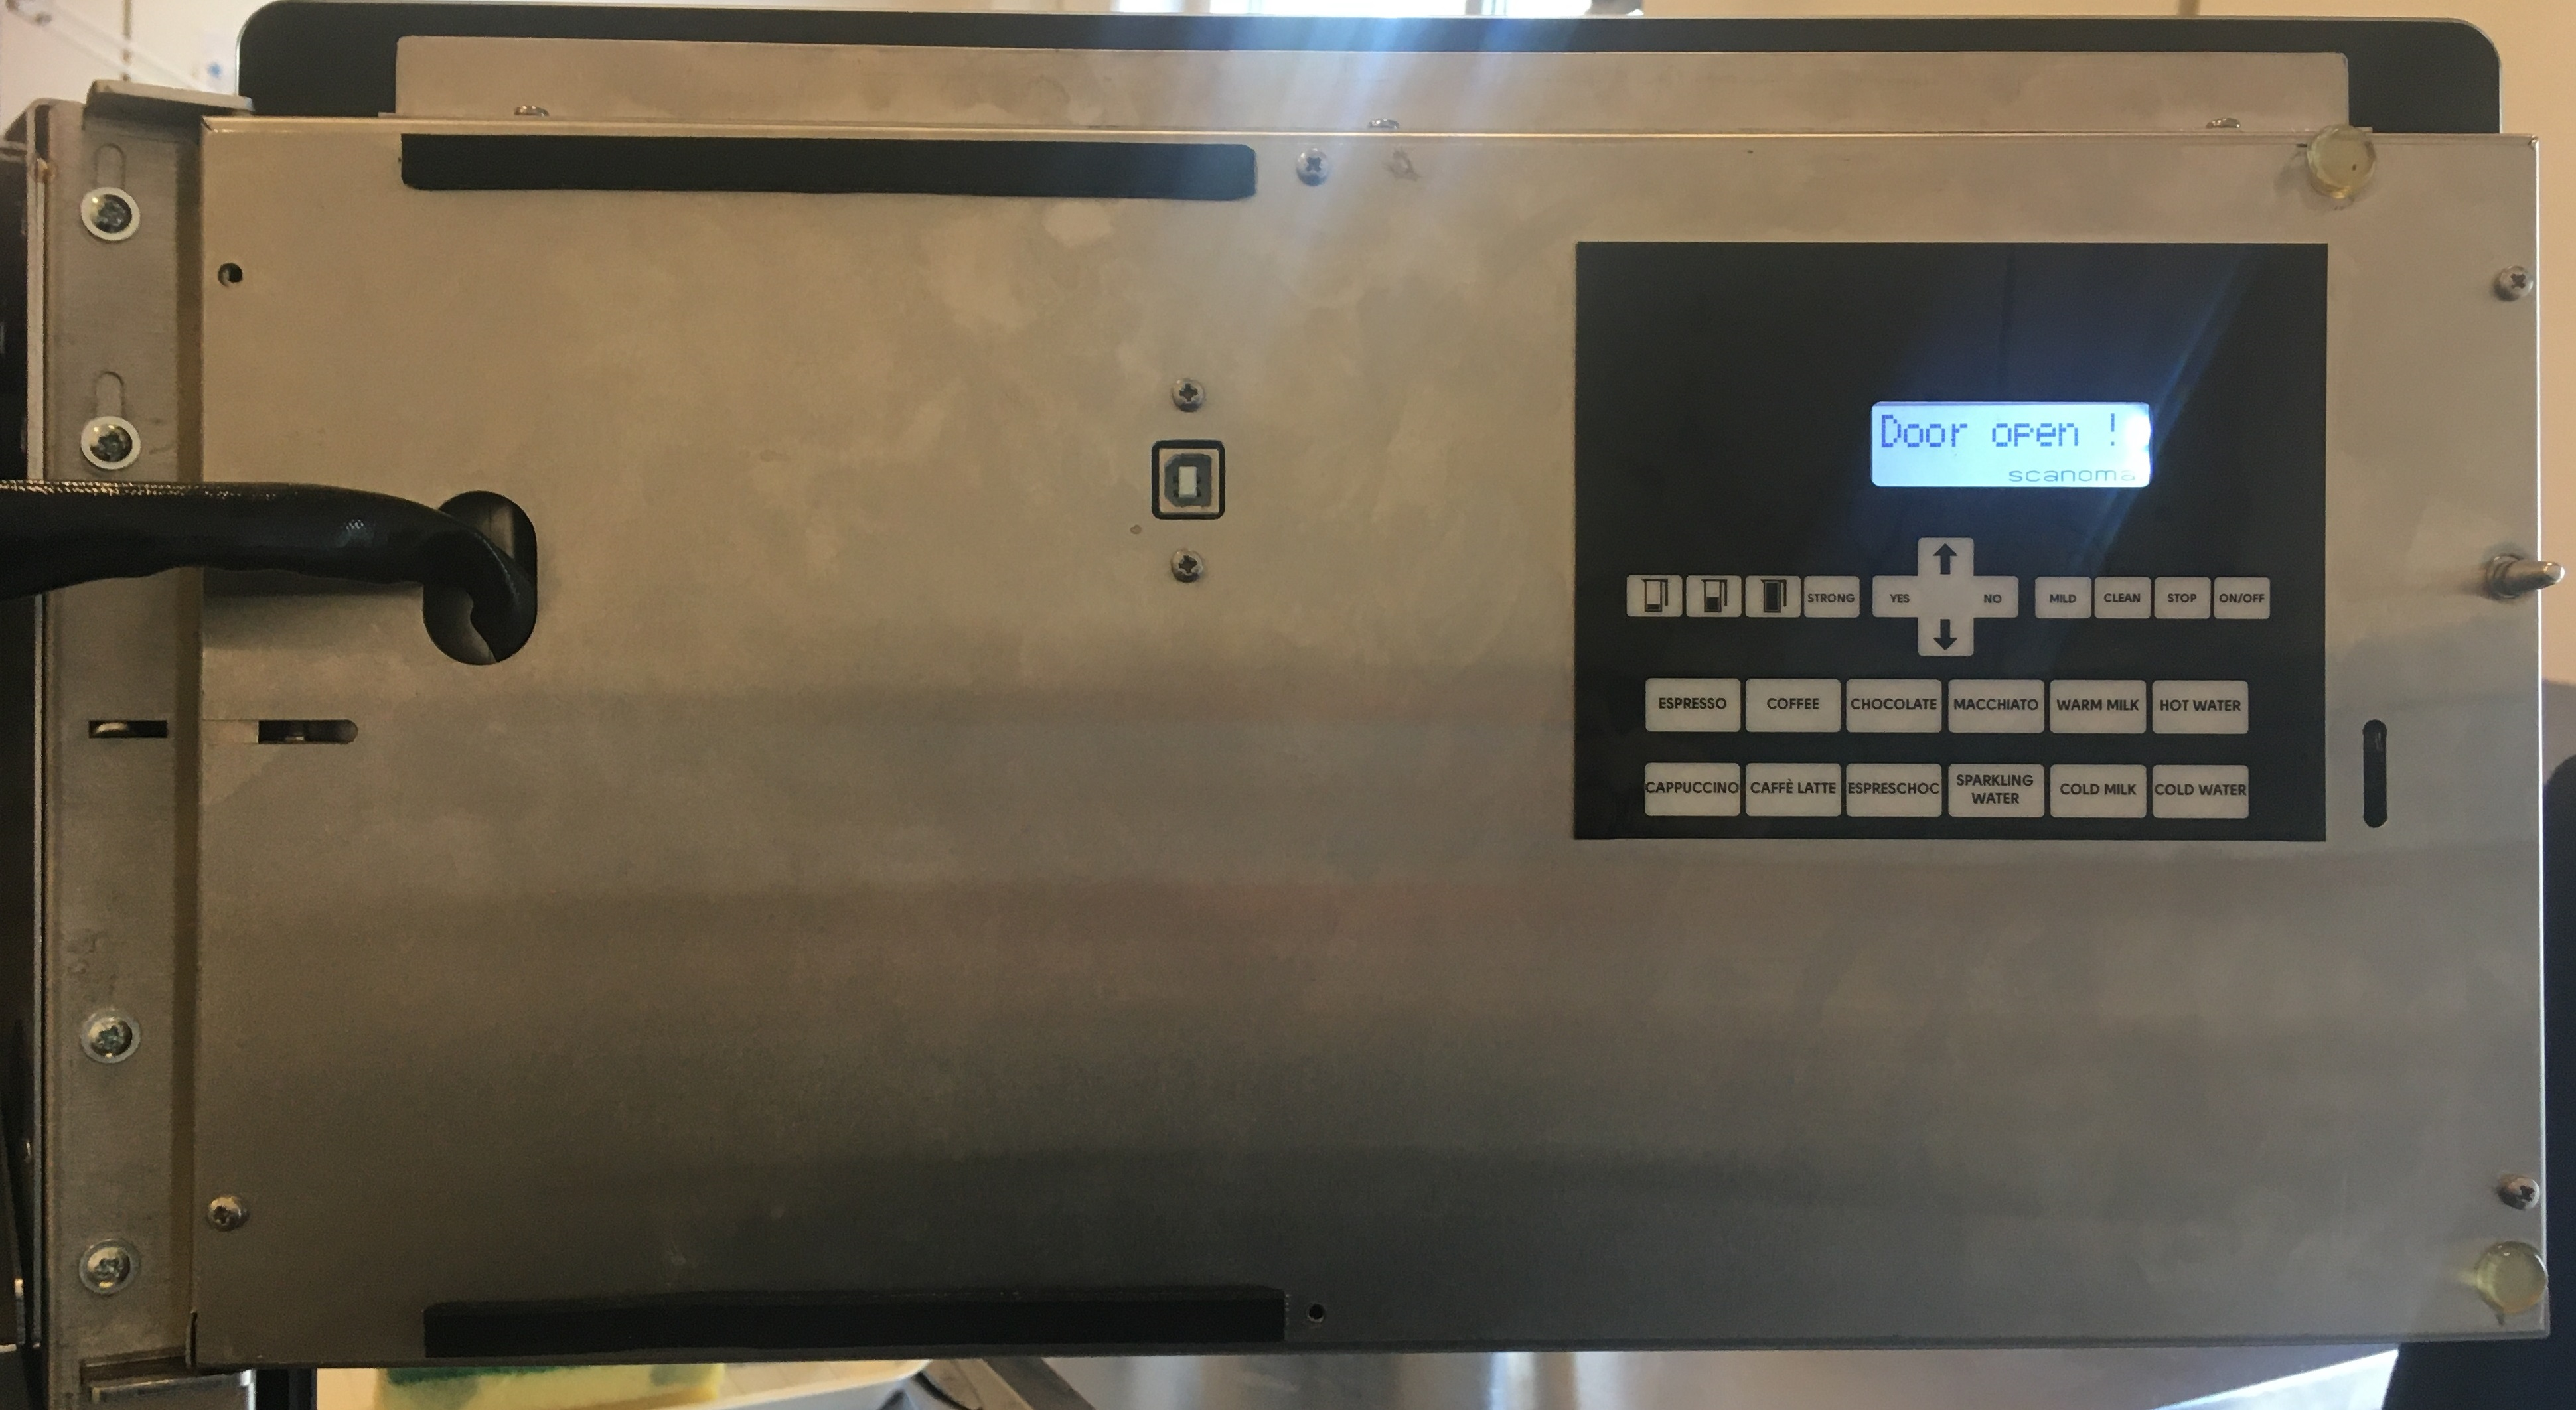
Door front:

Door front inside:
 Door back:
Door back inside:
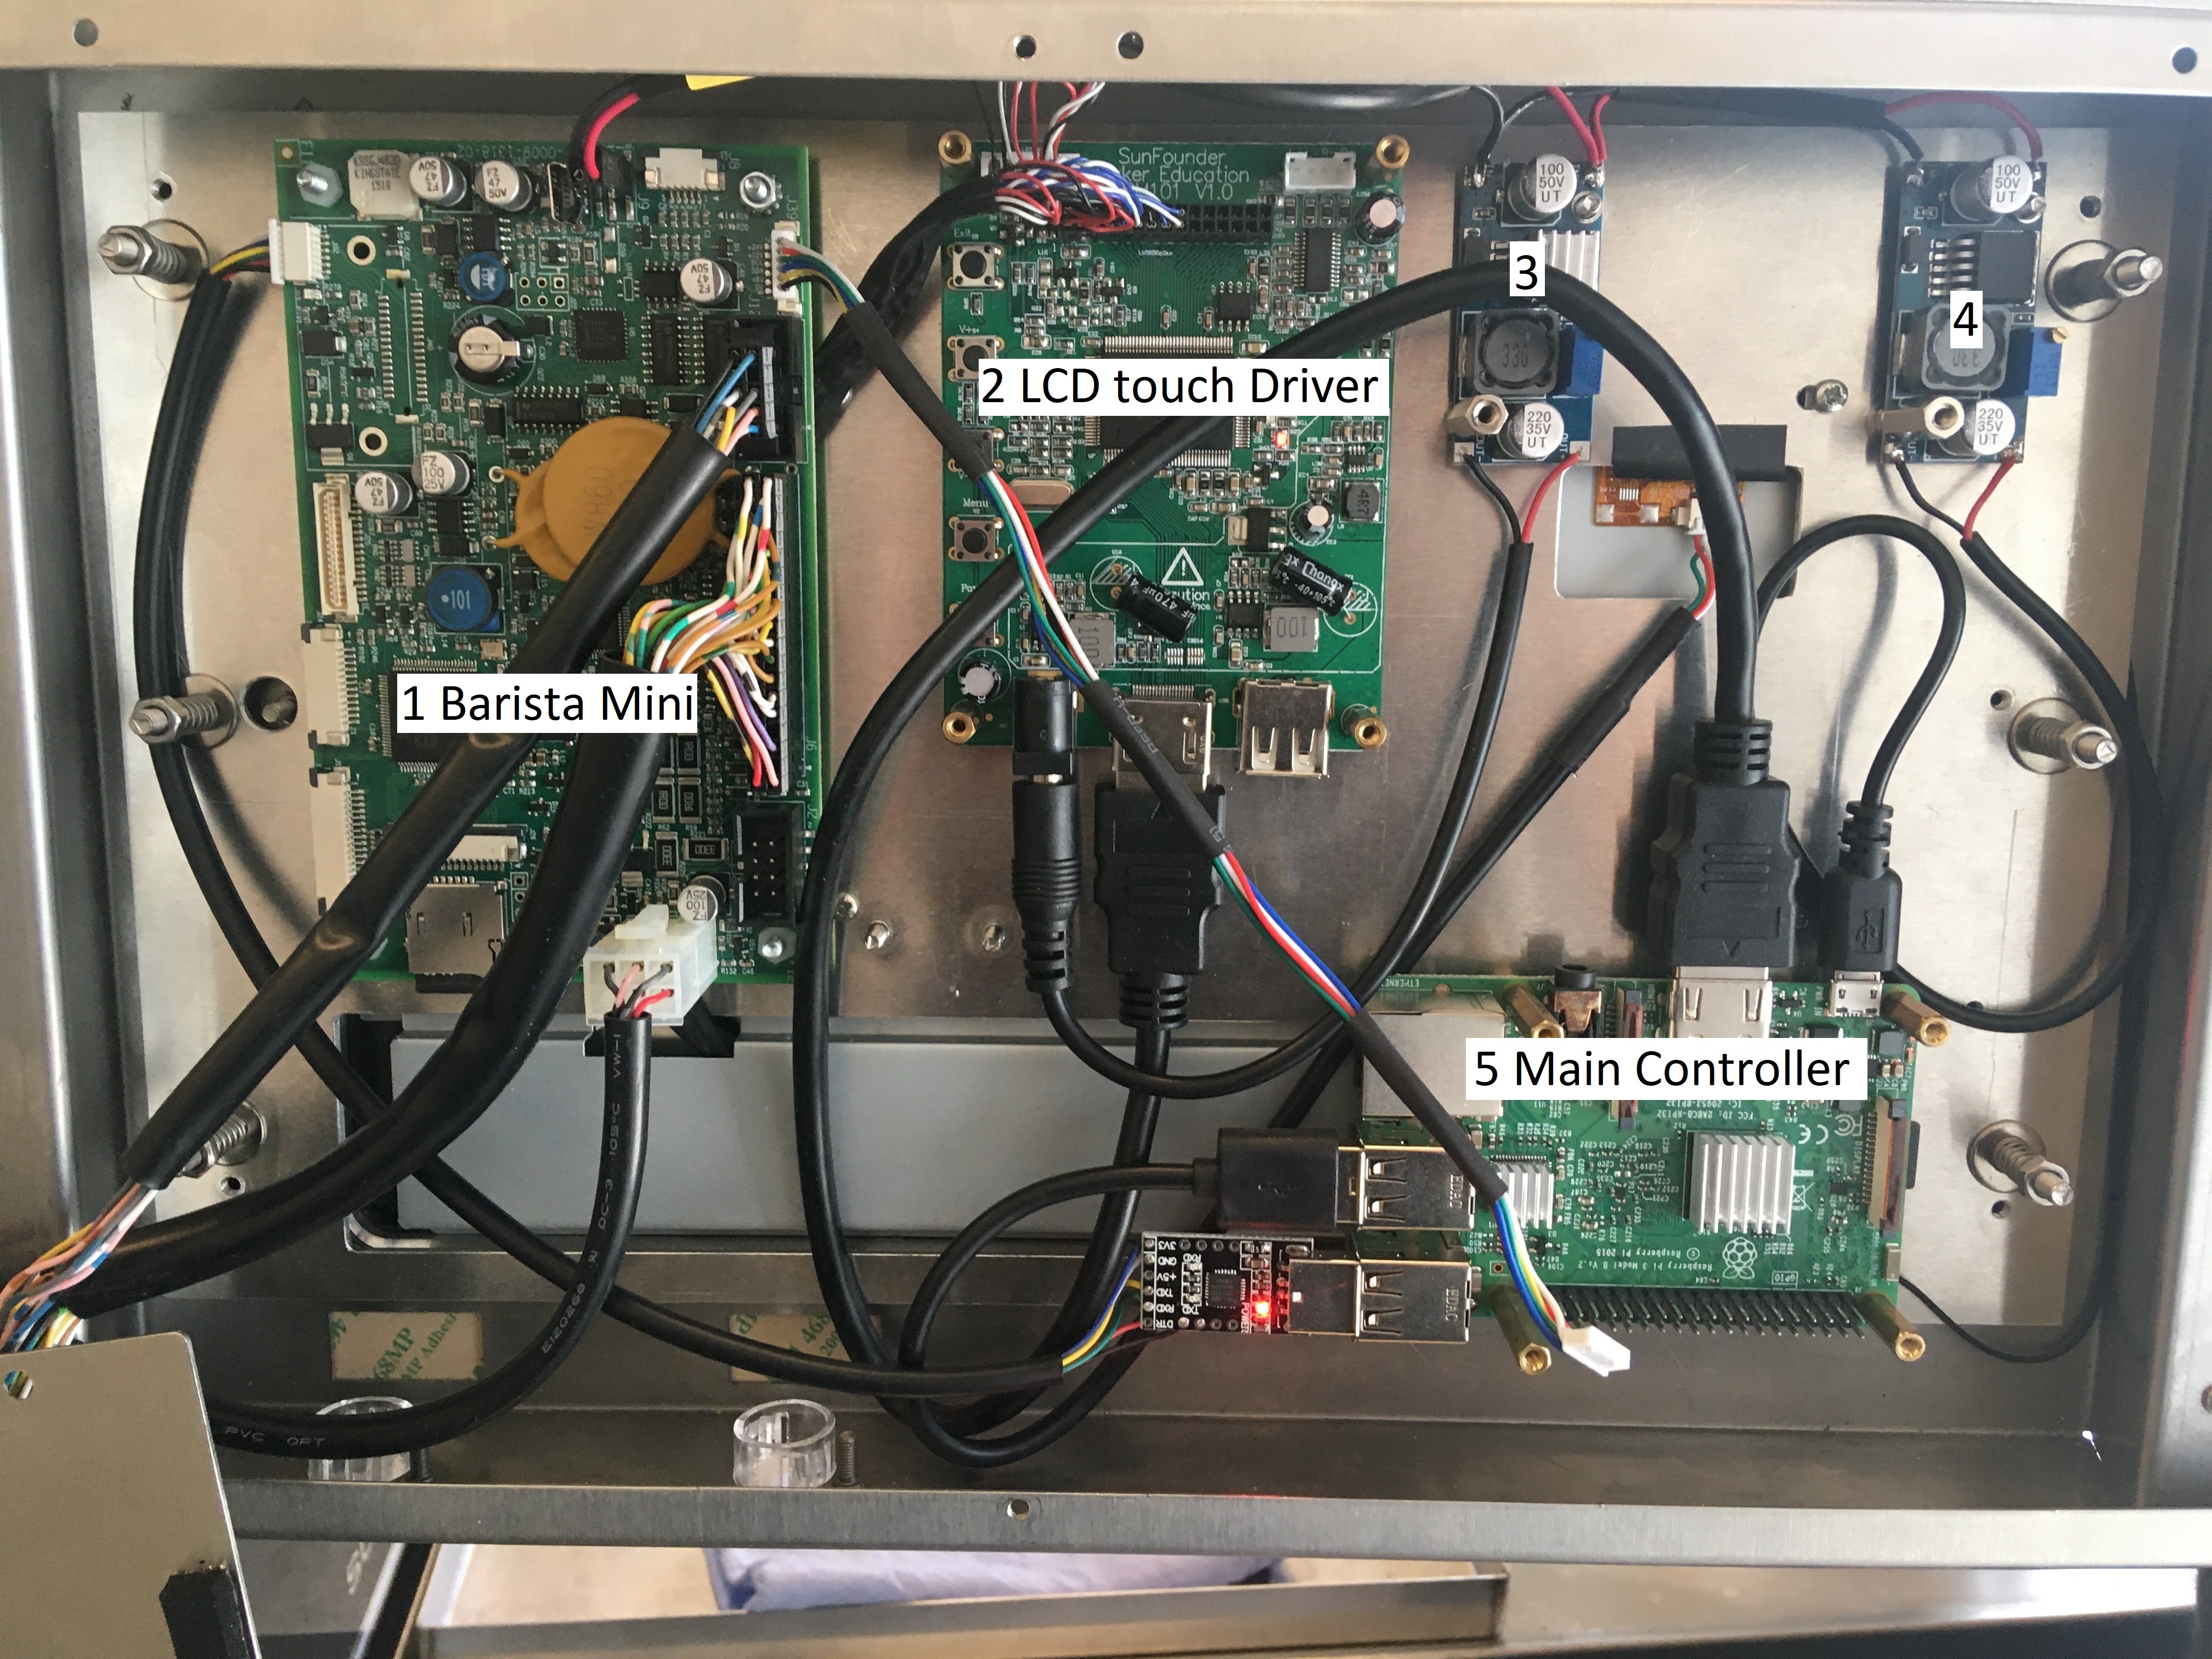
Functionality of boards and ports
Barista Mini(1)
The SD-card is used to hold the firmware of the machine i.e. the Setup.xml, and Recipe.xml, and also its serial number. Firmwares to run a Venezia must be v4.0.0 or newer, as the configuration of SystemInput used for WaterTank was introduced in v4. These features require at least BaristaPC v3.0.0. DO NOT USE Barista PC v2 to update the Setup.xml for firmware v4
Connections
The USB-B socket on the backside of the door, left of the Keyboard/Display, connects to the Barista Mini(1) board. It is used to update Recipes(.xml), and Setup(.xml) with its settings, as well as serial number. It is NOT used to get the machine online, such as WIFI.
Serial connection transports menu, orders etc to the user through the TopBrewer app. In the Venezia Touch, that app is running on the Main Controller(5), and it communicates over a serial connection. The Barista Mini board must have its External Userinterface (ExtUi) setting in Setup(.xml) set such that it fits the given hardware. During debug, one could use other module types.
- Bluetooth Classic
- Bluetooth LE
- Cable (Serial connection)
IIC connection is used to connect the internal small display and keyboard on the Venezia Touch Door internal cover.
LCD Driver(2)
This board takes power from PSU(3) and signal, potentially tweaks it using the local adjustment keys (contrast, brightness, ...) and sends it to the LCD screen on the front of the door.
Connections:
It takes its signal from the Main Controller(5)
PSU(3)
Power Supply Unit for the LCD Driver(2)
Primary: 31V DC
Secondary: 5V DC
PSU(4)
Power Supply Unit for the Main Controller(4)
Primary: 31V DC
Secondary: 5V DC
Main Controller(5)
The software of the Main Controller(5) is located on its local SD-card. To update the software manually, follow the How to manually update the Venezia Touch app from a Windows PC. The task of the Main Controller(5) Linux board, is to run the build-in The Venezia TopBrewer application.
Connections:
Touch signal from the LCD screen is received over USB. During triage, one can use a standard USB mouse to send inputs. NB: A standard USB mouse can be used as user inputs.
Video output signal over HDMI to the LCD Driver(2). NB: To verify that output is ok, one could use a stand HDMI monitory. Be aware that it is normal that the output does not change resolution to fit other screen sizes then that of the provided display.
A USB-to-serial connection is used to connect to, and control, the Barista Mini(1) board, instead of the normal bluetooth connection from TopBrewers. The data send over this bus is not compatible with the bluetooth modules.
The Venezia TopBrewer application
Menu app is retrieved from the Barista board over a serial connection (not bluetooth) and show the menu on the high resolution display. This app is used to set the network connection, which in turn is used to download firmware for Barista Mini(1). The app also forwards brew event messages to CoffeeCloud. If there is no internet connection, a buffer is used to store the events. On boot, the buffer is cleared.
Comments
0 comments
Article is closed for comments.